How to use USB with PageFly?
Our app integrates seamlessly with PageFly, letting you display sales-boosting widgets directly on your custom-designed pages. This guide walks you through how to activate and display USB widgets using PageFly.
Configuring the PageFly App
Follow these steps to add a widget to a page built with PageFly.
Enabling the Required Apps:
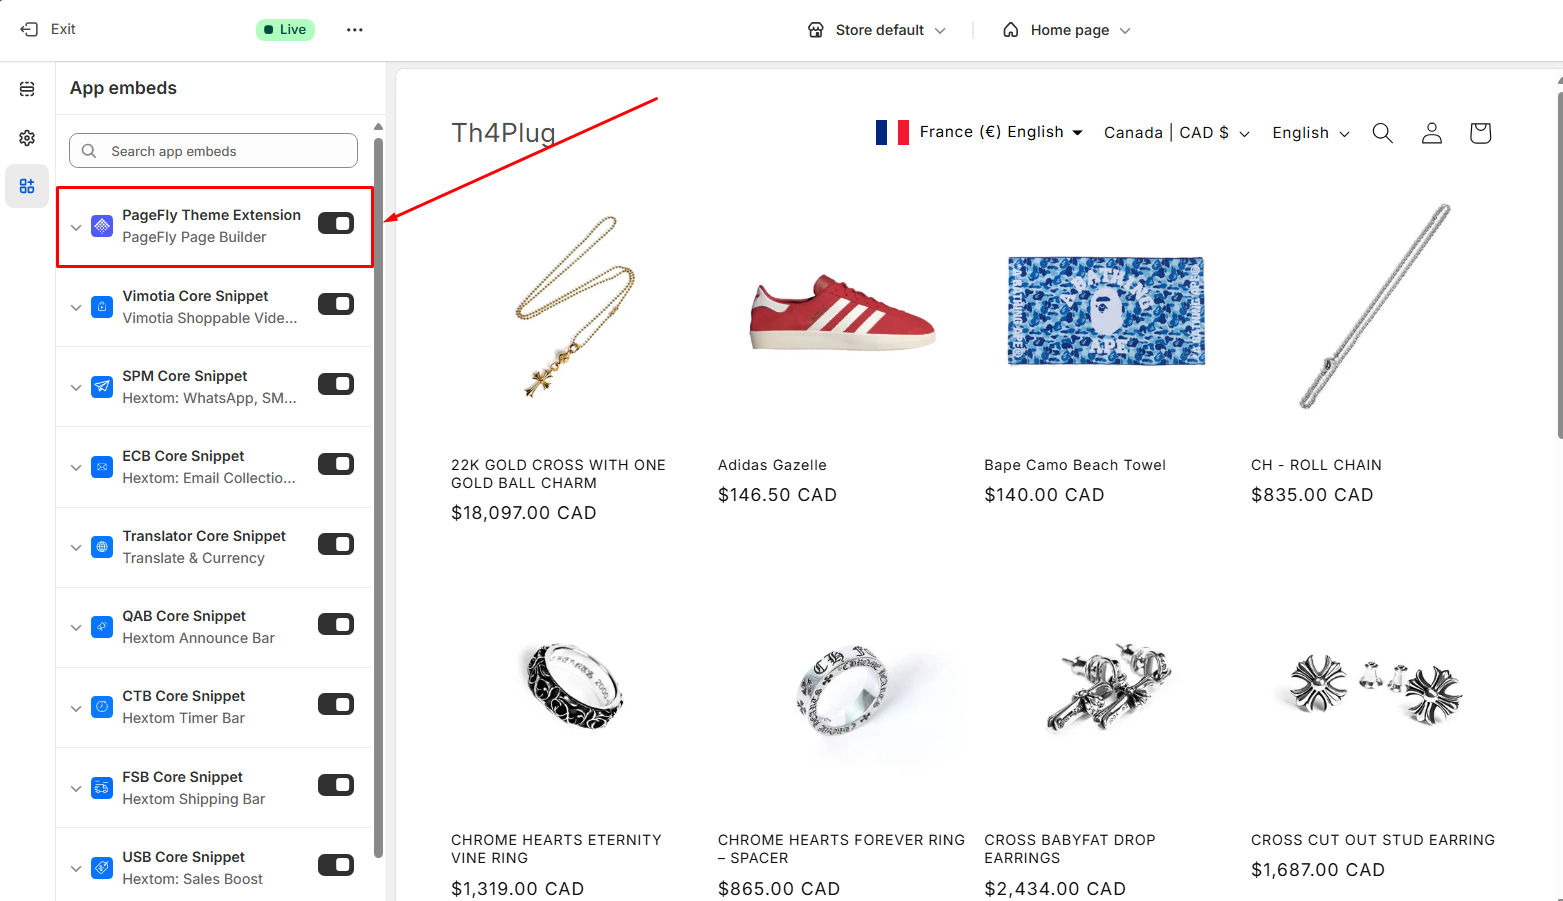
- Turn on the PageFly Theme Extension app embed in your theme.
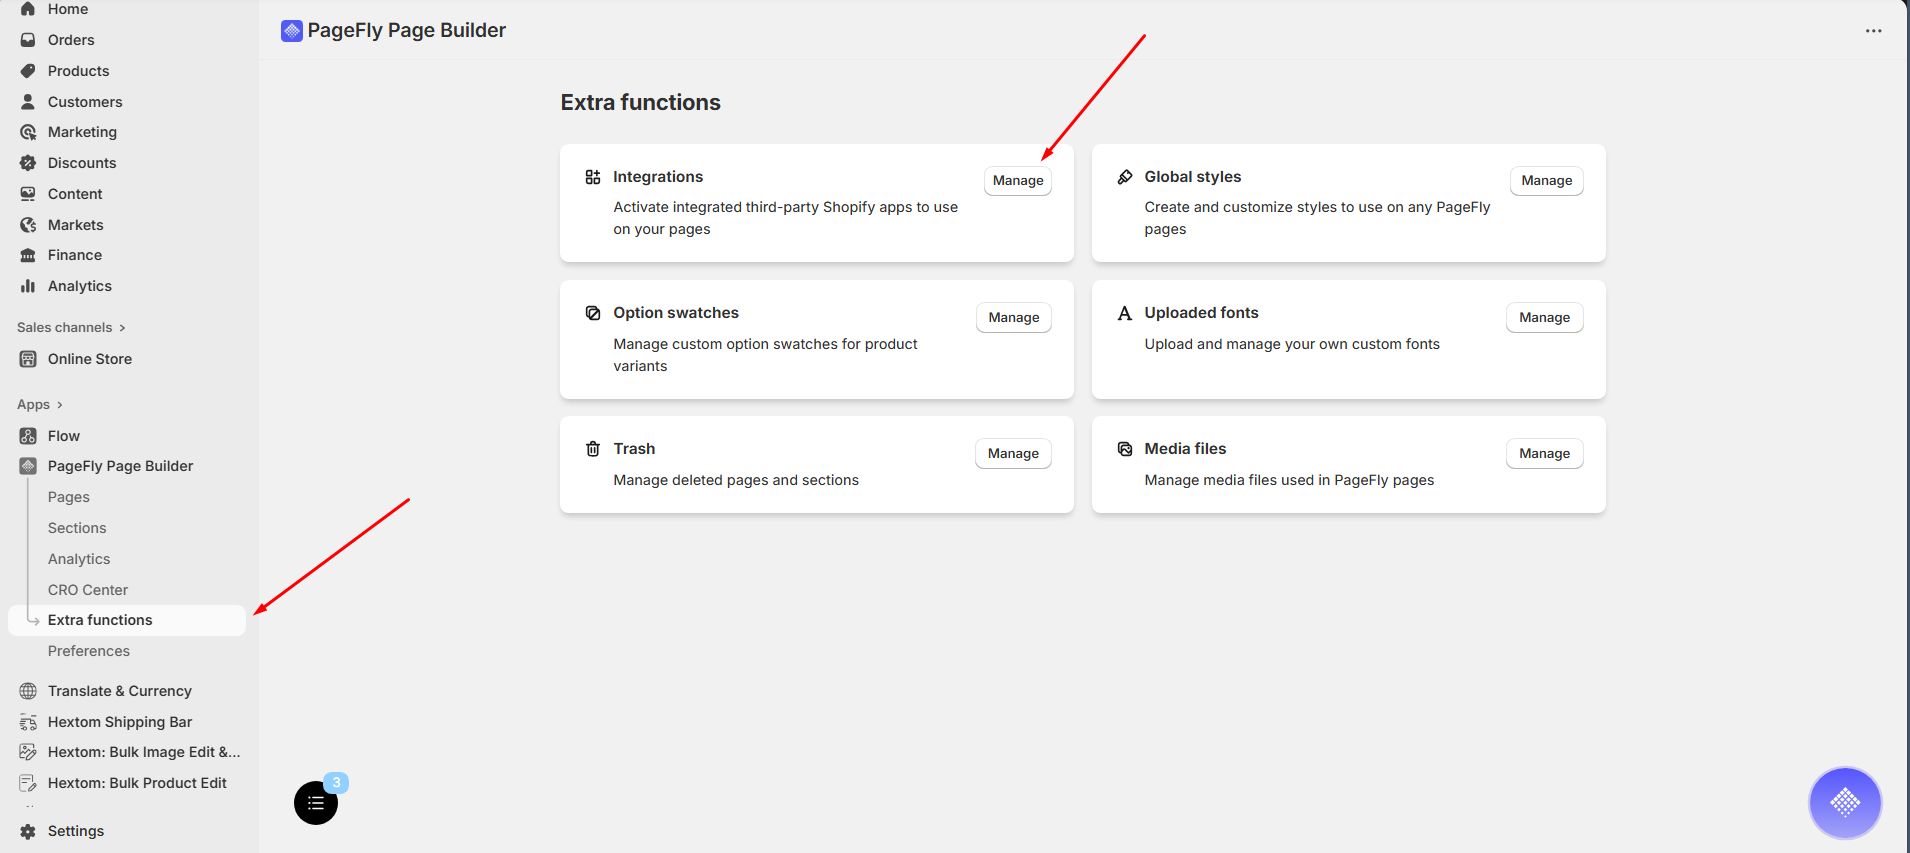
- Open the PageFly app and navigate to Extra Functions → Integrations.
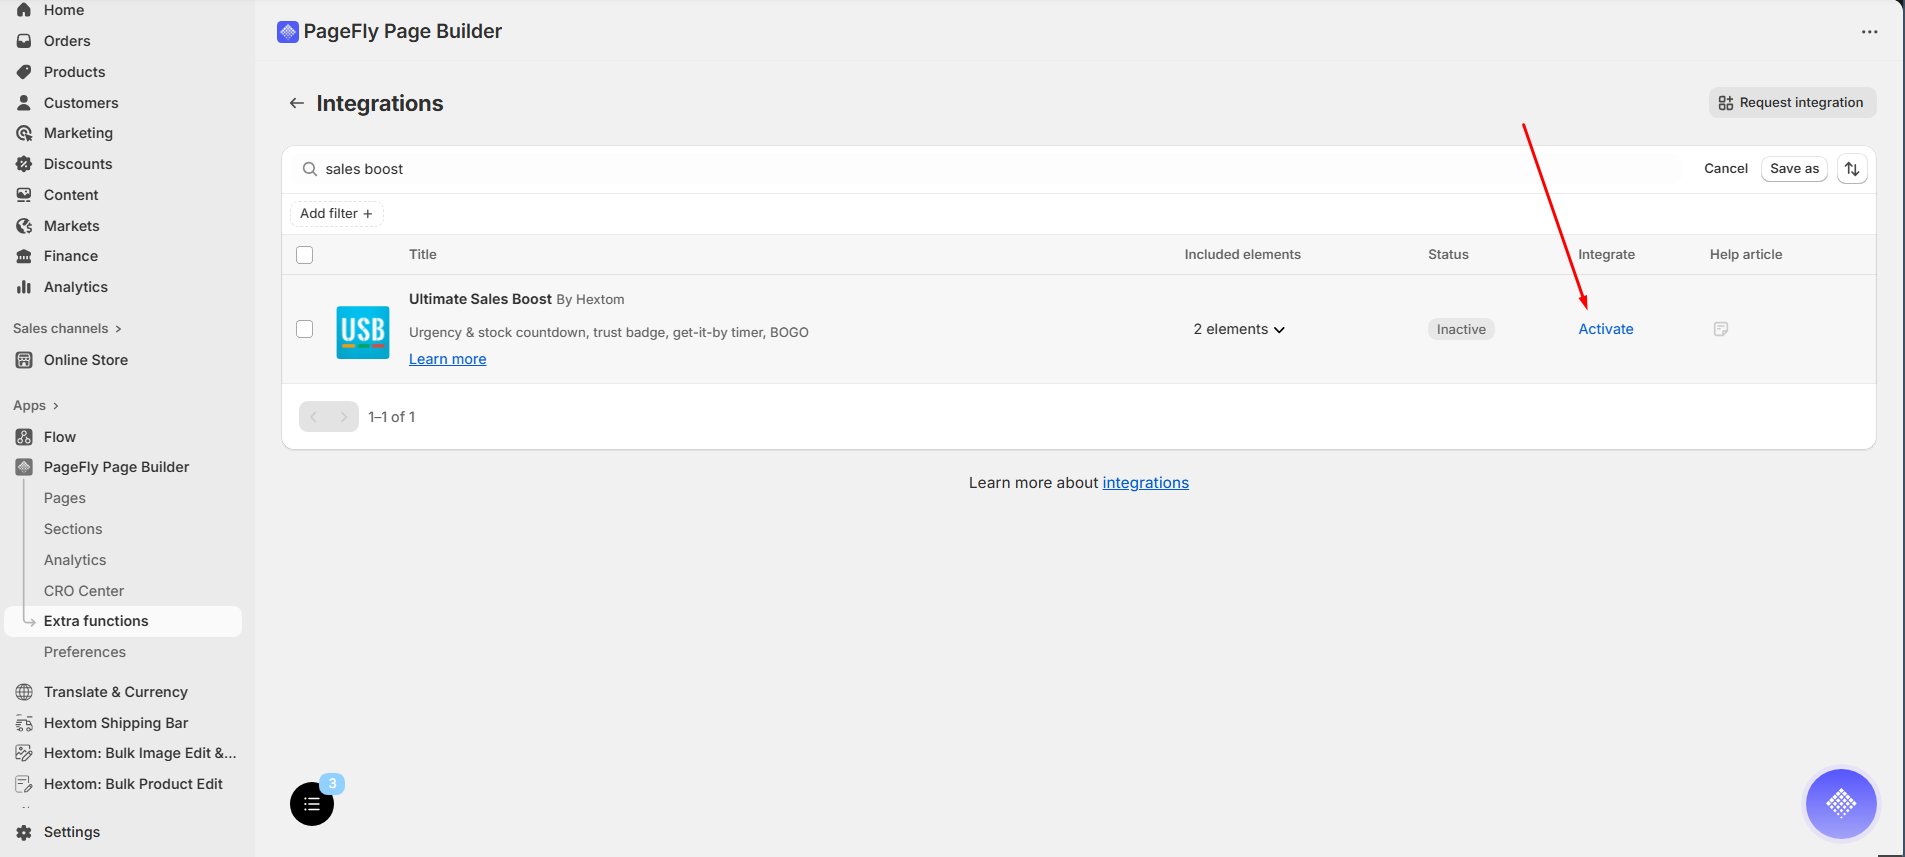
- Search for Hextom's Ultimate Sales Boost and click Activate.
Creating a USB Campaign and Adding It to PageFly
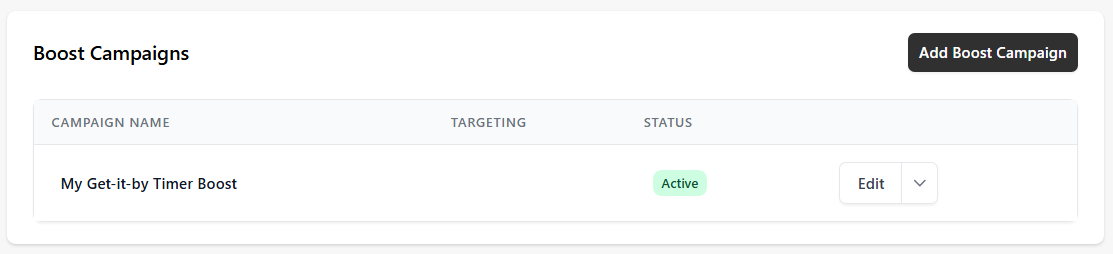
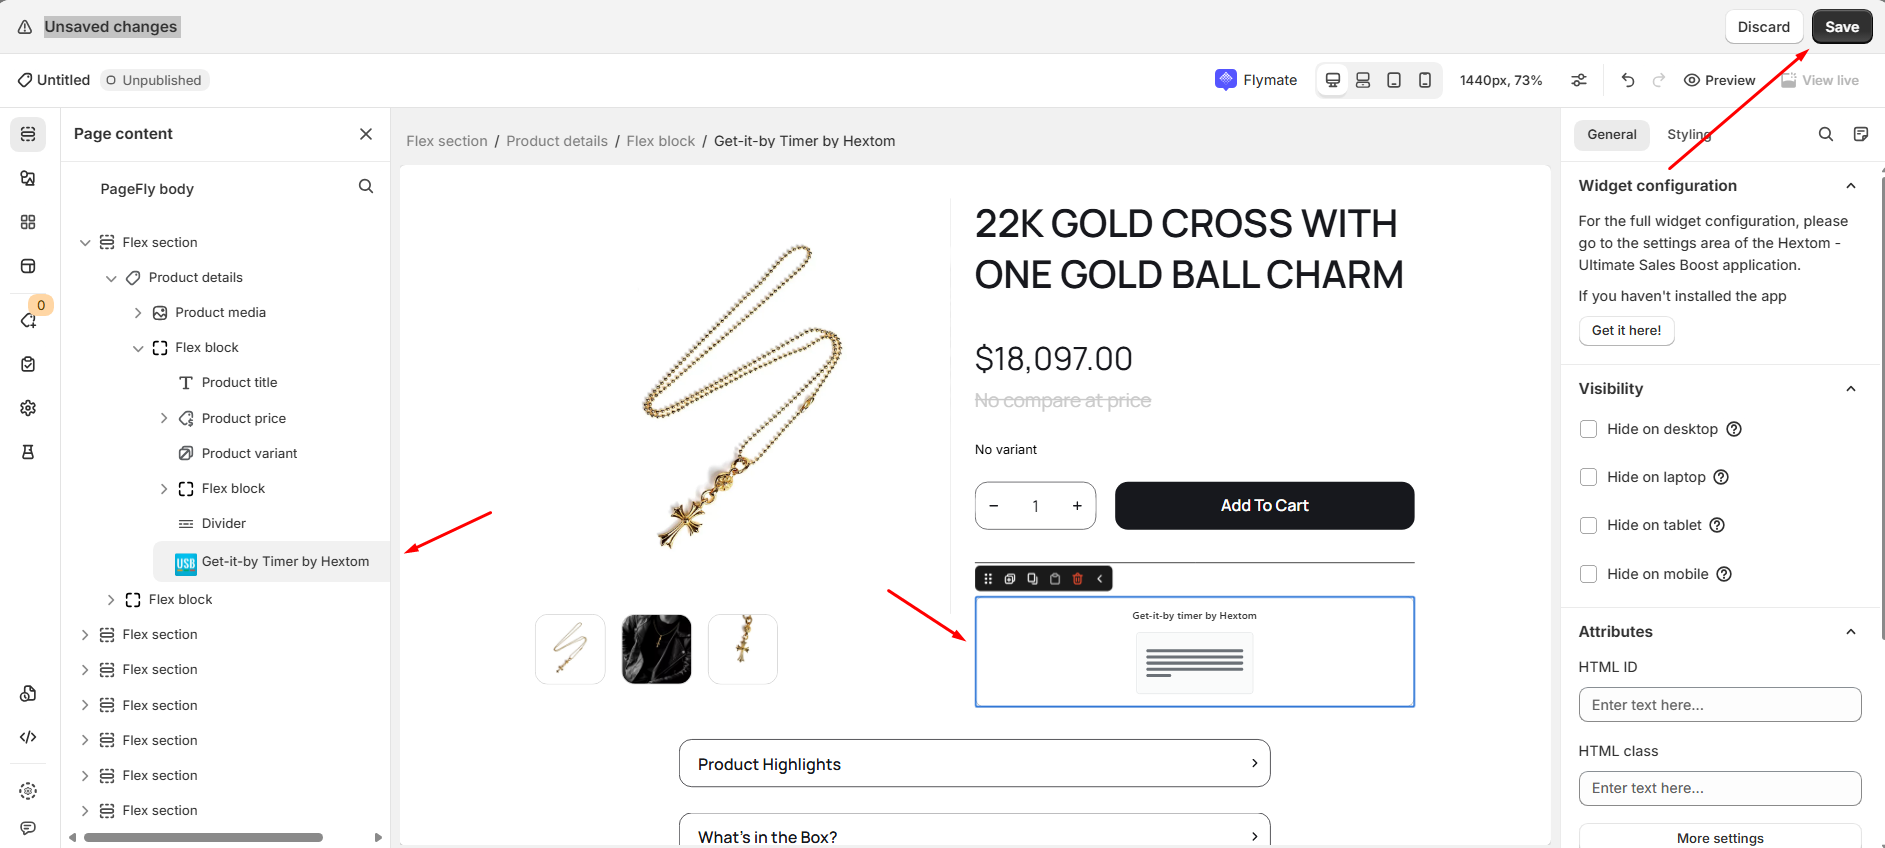
The steps below use the Get-it-by Timer widget as an example, but the process is the same for any widget.
- Activate and configure your widget campaign.
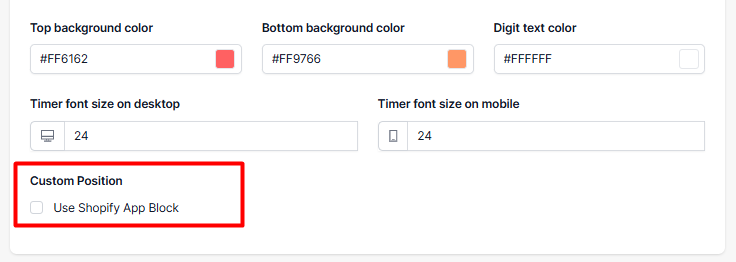
- Enable Custom Position — scroll to the bottom of the configuration section, tick the Custom Position checkbox, and save your changes.
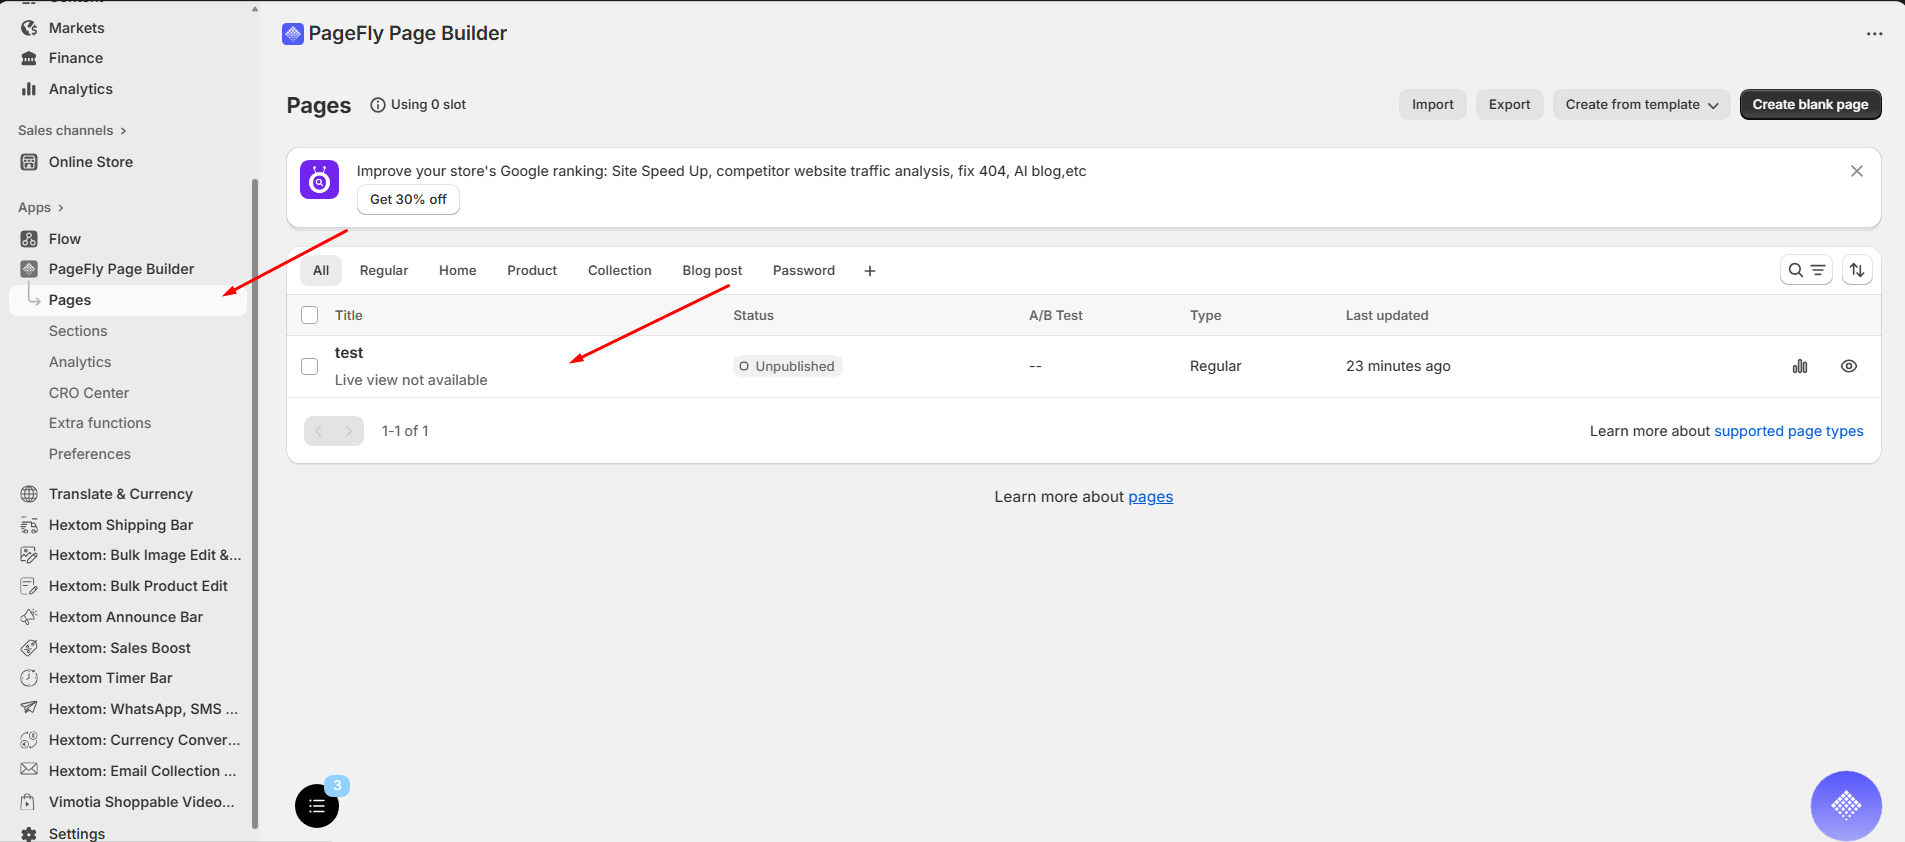
- Open the page you want to edit in PageFly.
- Navigate to Third-Party Elements and search for "Hextom".
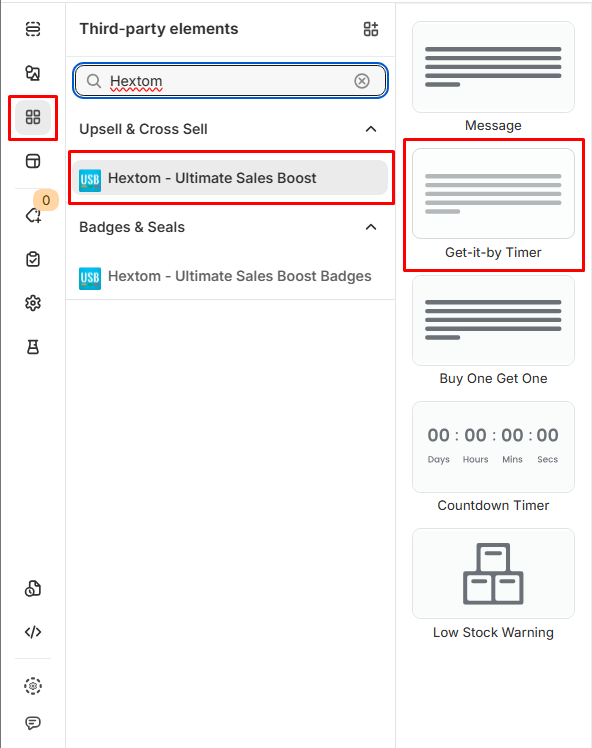
- Drag your widget onto the layout preview, adjust its position as needed, and click Save.
Note: PageFly manages widget placement for Product Page elements when using USB, while USB handles the Product Image Overlay for homepages, product pages, and collection pages.
If you have any questions or need further assistance, feel free to contact us at help@hextom.com. We're happy to help!